Auto Installing AWS ServiceLogs
Please verify if the Prerequisites are met & satisfied on the AWS Console.
Steps for Configuration AWS Connection.
- Login to the SixthSense portal.
- Click Integrations on the left pane.
- Click Configure in the Amazon Web Services card available. The All AWS Configurations page appears.
- Click + Add configuration.
- In the Configure AWS screen, fill in the following details.
| Field name | Description |
|---|---|
| Connection name | The identifier or label assigned to a specific connection when connecting to a database. |
| Access key ID | A unique identifier that is public and can be used to identify the IAM user specifically created for Rakuten Sixthsense AWS Configuration. |
| Secret access key | A secret string that is used together with the Access Key ID to sign programmatic requests. |
| Pull frequency (min) | Pull frequency is how often a system, application, or service requests or "pulls" data from another system or source. Can be at subscription or service level. |
- Click Configure.
The connection is verified with the AWS credentials and you will see the AWS card under the Installed header.
Once you have configured AWS, you will see the AWS Configurations page similar to the following screen.
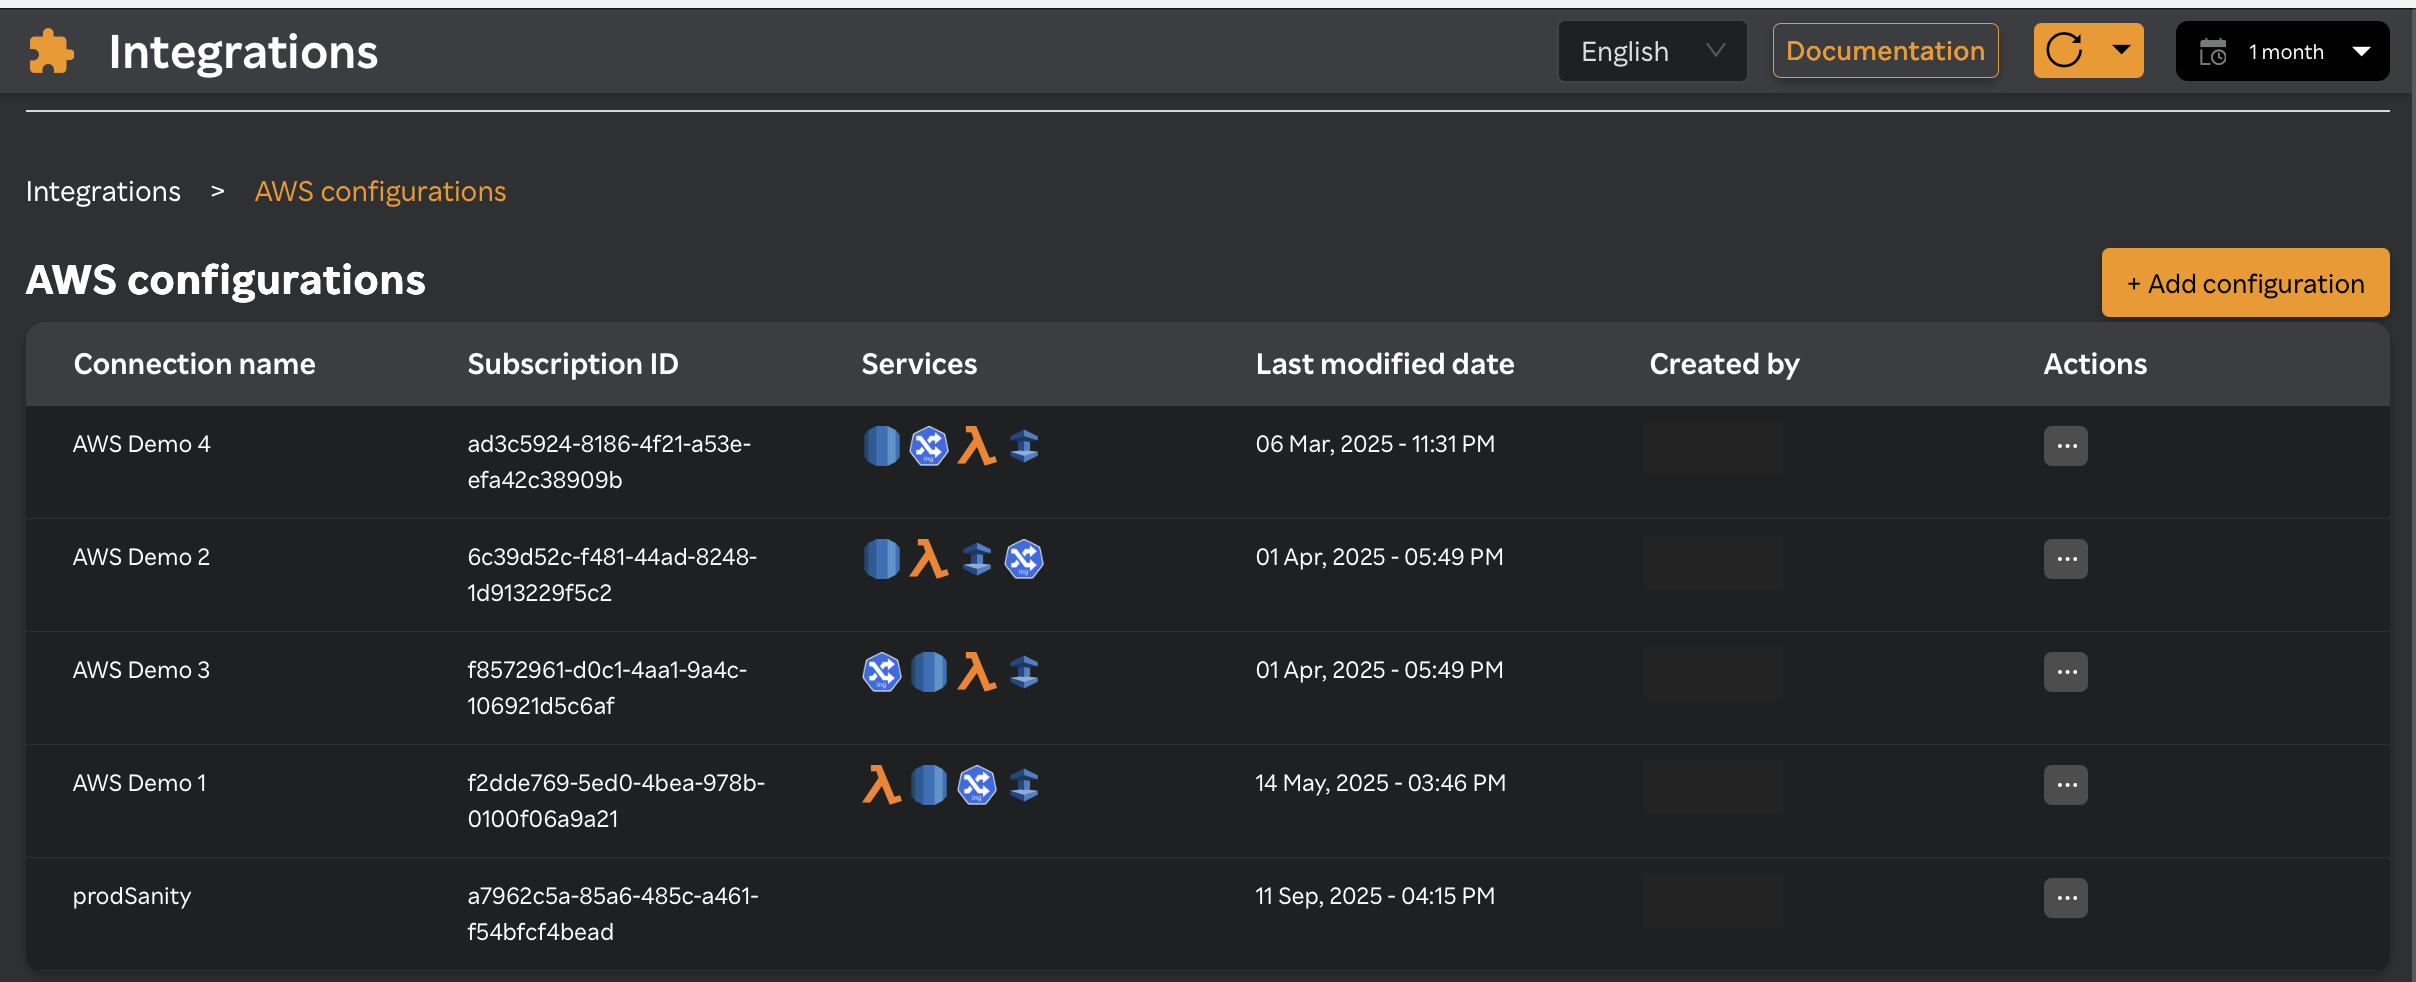
This page contains the following details in a table format.
| Column Name | Description |
|---|---|
| Connection Name | The identifier or label assigned to a specific connection when connecting to a database. |
| Subscription ID | A unique identifier assigned to a subscription within a cloud service platform. |
| Services | Service Logs. |
| Last Modified Date | The date modified last. |
| Created by | The name of the user who created the connection. |
| Actions | You can choose to view services, edit, and delete a configuration. |
Steps for Auto Installation of AWS ServiceLogs
- Login to the SixthSense portal.
- Click Integrations on the left pane.
- Click Configure in the Amazon Web Services card available. The All AWS Configurations page appears.
- Click on ... in the Actions column against the connection name and select View services.
- Click on Auto Install on the AWS servicelogs card for Automatic Installation method.
- Now AWS servicelogs card pop's up a screen for configuring the Log Forwarders & their paths/files.
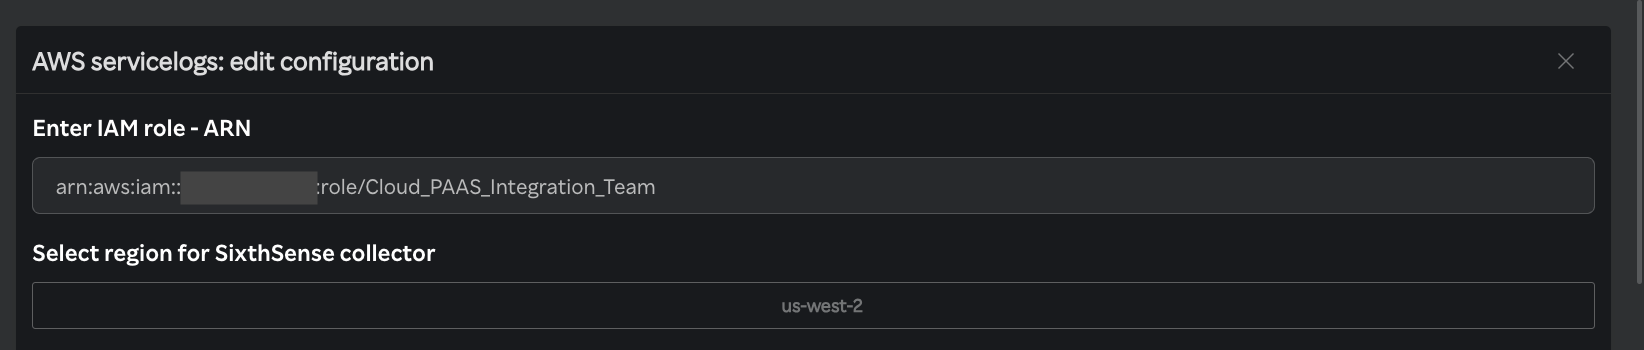
- Enter IAM Role ARN – Provide the ARN of the IAM Role created for ServiceLogs. This role must be assigned to the IAM user and possess all required permissions to access AWS services and securely perform actions—such as creating Lambda functions and attaching triggers—as outlined in Prerequisites.
Convention of role ARN
arn:[partition]:iam::[account-id]:role/[role-name]- partition - For standard AWS regions, it's
aws. For GovCloud or china, it might be different (e.g.,aws-us-gov). - account-id — The 12-digit AWS account number where the role exists.
- role-name — The name of the IAM role you created in that account for Rakuten Sixthsense AWS Configuration.
- partition - For standard AWS regions, it's
- Select AWS region in which the SixthSense log forwarding lambda function needs to be deployed. This ensures that logs from the selected AWS services are forwarded to the log forwarder and then forwarded to the Rakuten Sixthsense log monitoring capability.
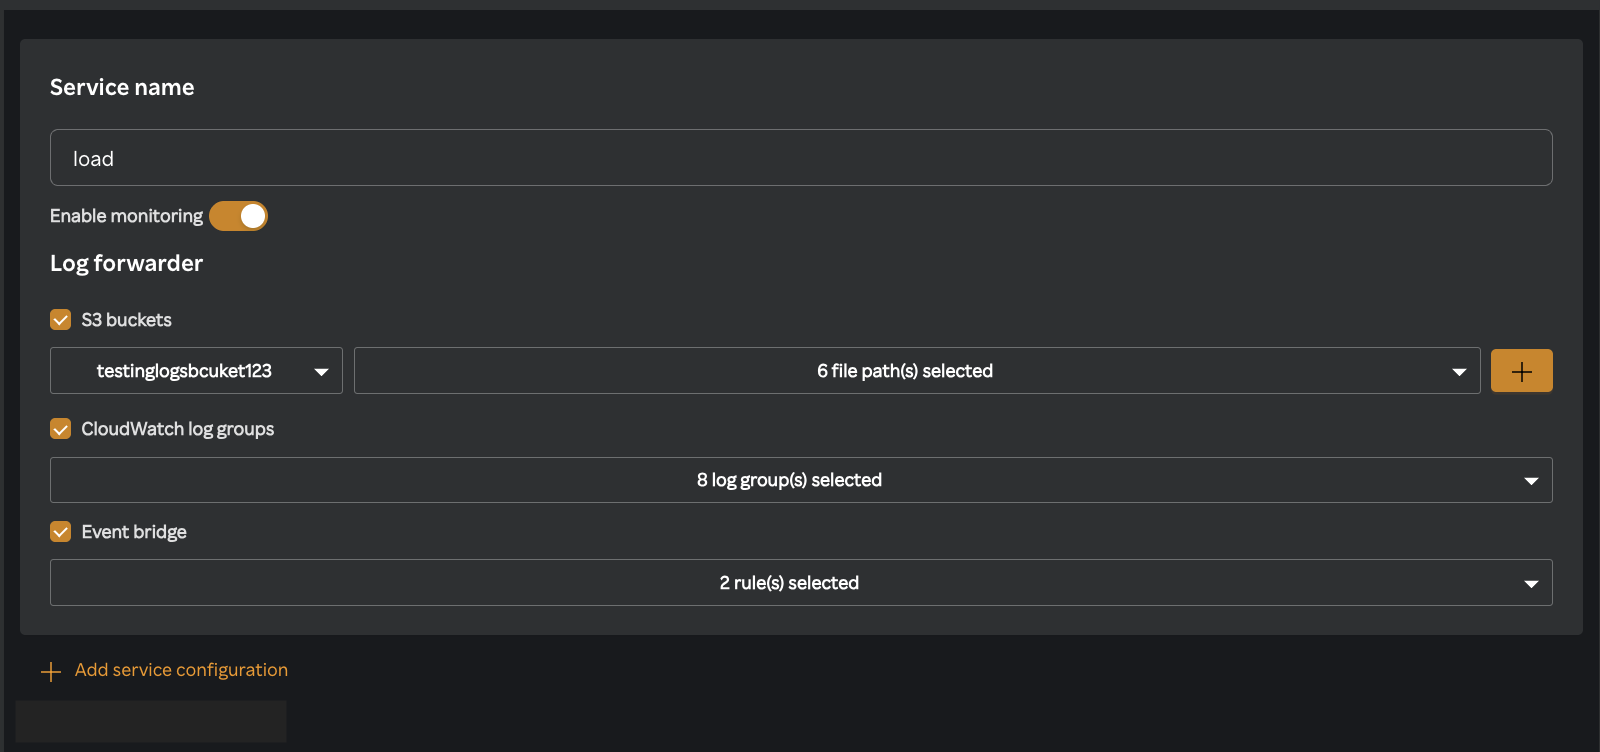
Service Name - Enter the name of the service to which logs should be forwarded within the Rakuten Sixthsense Log Monitoring capability.
Enable Monitoring toggle – Each service block includes an "Enable Monitoring" toggle that applies specifically to that service and monitors the configured log forwarder associated with it.
Log forwarder - There are three types of log forwarder
- s3 buckets – In this log forwarder type, logs are monitored by selecting an S3 bucket and file path. Once the user selects these, any configured triggers or actions on the specified file path are executed. The logs are then retrieved, ingested, processed, and displayed within the Rakuten Sixthsense log monitoring capability under the corresponding service name for analysis.
Note:1. The timestamp of the logs uploaded to the s3 bucket need to be in UTC format.2. A maximum of one trigger can be attached to a single S3 bucket so one bucket should be configured in a single connection only to avoid any failure of attaching triggers.- Cloudwatch log groups – In this type of log forwarder, logs are monitored by configuring CloudWatch Log Groups, where AWS services send their logs. These logs are then retrieved from the CloudWatch Log Groups and are displayed within the Rakuten Sixthsense log monitoring capability under the corresponding service name for analysis.
Note: Up to two triggers can be attached to a single CloudWatch log group.- EventBridge – In this type of log forwarder, logs are monitored by configuring EventBridge rules to capture and forward event-driven log data from AWS services and are displayed within the Rakuten Sixthsense log monitoring capability under the corresponding service name for analysis.
Note:1. A maximum of five triggers can be attached to a single EventBridge rule.2. To capture events configured via EventBridge rules, the user must have an AWS CloudTrail trail set up with logging enabled.Add Service Configuration - This enables the user to add a new service block, specify the service name, and configure the log forwarder by choosing from options such as S3 buckets, CloudWatch Log Groups, and EventBridge rules.
- Enable Monitoring toggle – The global Enable Monitoring toggle, located after the service blocks, controls the overall service logs configuration. Turning this toggle on or off does not affect the monitoring settings of individual service blocks; it only manages the overall AWS service logs monitoring.
- Click Save Configuration to install ServiceLogs. Once installation is successful, the ServiceLogs will appear under the Installed section.
- Note: Installation may take some time. During this process, users should avoid performing any actions or refreshing the page.

Steps for Editing Configuration of AWS ServiceLogs
- Login to the SixthSense portal.
- Click Integrations on the left pane.
- Click Configure in the Amazon Web Services card available. The All AWS Configurations page appears.
- Click on ... in the Actions column against the connection name and select View services.
- Click on Edit Configuration on the AWS servicelogs card.
- Edit the required fields such as Service Name, Log forwarder, Enable Monitoring toggle as required.
- Click on save configuration.
Steps for Disabling Monitoring of AWS ServiceLogs
- Login to the SixthSense portal.
- Click Integrations on the left pane.
- Click Configure in the Amazon Web Services card available. The All AWS Configurations page appears.
- Click on ... in the Actions column against the connection name and select View services.
- User can disable AWS ServiceLogs monitoring by toggling OFF the switch on the AWS ServiceLogs card, visible under the Installed section.