Transaction naming convention
While naming endpoints, we are auto-discovering the transactions by using the last 2 Segments of the URI. The issue is that if the last 2 segments have dynamic values, then the endpoint list will grow exponentially. This will result in UI slowness and alerts can’t be configured for all the endpoints.
You can resolve this by using Application for configuring a single rule for an entire application and Endpoints to configure 20 rules for an application. Use the following procedure for configuring rules.
Implementation: When you create a rule, it may take a minute to apply. Once active, it begins evaluating conditions as per the rule logic. The same delay applies when a rule is deleted.
Application
- Click the
 icon on the left pane.
 - Select the Application tab.
The following screen appears.
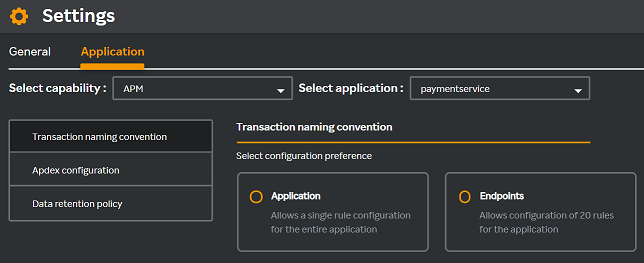
- Select the Application radio button.
The following Set application rule window appears.
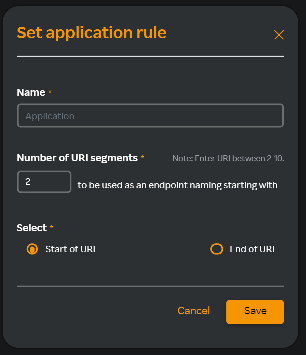
- Enter the application name in the Name field.
- Select the number of URI segments in the Number of URI segments drop-down list.
- Select Start of URI if you want the segment at the beginning of the URI or select End of URI if you want the segment to appear at the end.
- Click Save.
Navigate to APM > Endpoint where you can see the URI with the number of segments you have defined under the Name column.
Endpoints
- Click the icon on the left pane.
- Select the Application tab.
- Select the Endpoints radio button.
The following Set endpoint rule window appears.
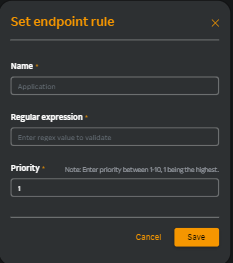
- Enter the application name in the Name field.
- Enter the regex value in the Regular expression field. For more information about pattern matching to group endpoints, see Pattern matching.
- Select the priority from the Priority drop-down list.
- Click Save.