Token Manager
Tokens enhance data security by reducing the exposure of sensitive information. They are unique identifiers that are used for authentication, authorization, session management, or as access keys. A token manager is used to manage these tokens within a system with the following benefits in a monitoring or logging system:
- tokenize sensitive information such as log messages, error traces, and metrics so that it helps protect the privacy and security of users whose data will be captured in the system.
- protection from access to sensitive data.
- access control to authorized users to access and view specific data.
- tokenization can be quickly performed where massive amounts of data are generated and processed, without impacting system performance. This allows scaling your observability infrastructure while maintaining data security.
Adding a token
- Navigate to Synthetic endpoint monitoring on the left pane in the Observability portal.
- Click the Token manager tab.
- Click + Add token.
- In the Add token window, fill in the following fields.
| Field | Description |
|---|---|
| Token name | Name for the token. |
| Grant type | The method or protocol used to obtain an access token from an authorization server. Here client credentials are used. |
| Access token URL | The endpoint for an authentication server used to exchange the authorization code for an access token. |
| Client ID | The client identifier issued to the client during the application registration process. |
| Client secret | The client secret issued to the client during the application registration process. |
| Scope | Scope of the access request. |
| Audience | A URI that indicates the target audience/services where you intend to use the token. |
| Resource | A URI that indicates the resource/target service where you intend to use the token. |
- Click Save.
note
You can enter a token in the Search token field and click the Search icon to search for an existing token.
Viewing all tokens
- Navigate to Synthetic endpoint monitoring on the left pane in the Observability portal.
- Click the Token manager tab. By default, the All tokens tab is selected.
The following dashboard with all the existing tokens are displayed.
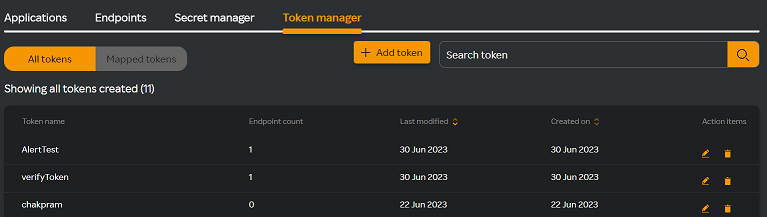
| Column Name | Description |
|---|---|
| Token name | Name for the token. |
| Endpoint count | The total number of endpoints. |
| Last modified | The date on which the token was last modified. |
| Created on | The date on which the token was created. |
| Action items | Click the edit |
note
A token is linked to an endpoint. To delete token, either delete the endpoint or edit the token in the endpoint. For more information, see Managing endpoints.
Deleting a token
Navigate to Synthetic endpoint monitoring > Token manager.
Click the delete
 icon next to the token you want to delete.
You will see a list of endpoints configured with a token in the Delete token window.
icon next to the token you want to delete.
You will see a list of endpoints configured with a token in the Delete token window.note
If no endpoints are configured, you can click Delete token to delete the token.
Click Manage configured endpoints to delete the associated endpoint. You will be taken to the Endpoints dasbhoard under Synthetic endpoint monitoring.
You can do either of the following:
4a. Delete an endpoint. For more information, see Managing endpoints section under the Endpoints topic.
4b. Edit an endpoint and update the token in the endpoint. For more information, see Managing endpoints section under the Endpoints topic.
Viewing mapped tokens
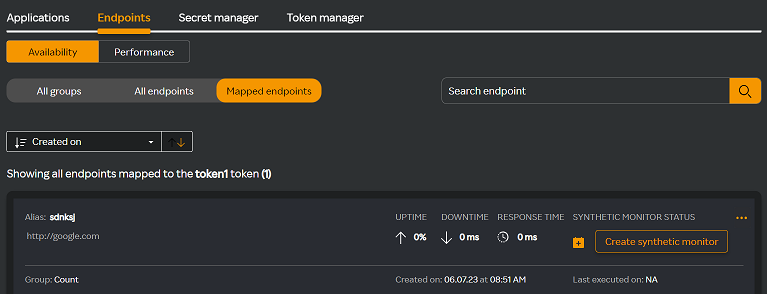
- Navigate to Synthetic endpoint monitoring > Endpoints.
- Click the Mapped endpoints tab.
- Click Mapped tokens. You will see all the endpoints mapped to a token.
Multi-column Filter
- Multi-column filter can be applied on numeric columns within the Synthetics Token Manager Table to refine the displayed data based on specific conditions.
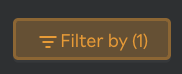
- When the user clicks on the “Filter by” option, user can apply filter below numeric columns
| Column Name | Description |
|---|---|
| Endpoint count | Total number of synthetic endpoints associated with the token. |
| Last modified | Date and time when the token was last modified. |
| Created on | Date and time when the token was originally created. |
- Each filter condition is applied using the below operators and value ( user input based on the unit)
| Operator |
|---|
| Greater than |
| Less than |
| Equals |
| Greater than or equals |
| Less than or equals |
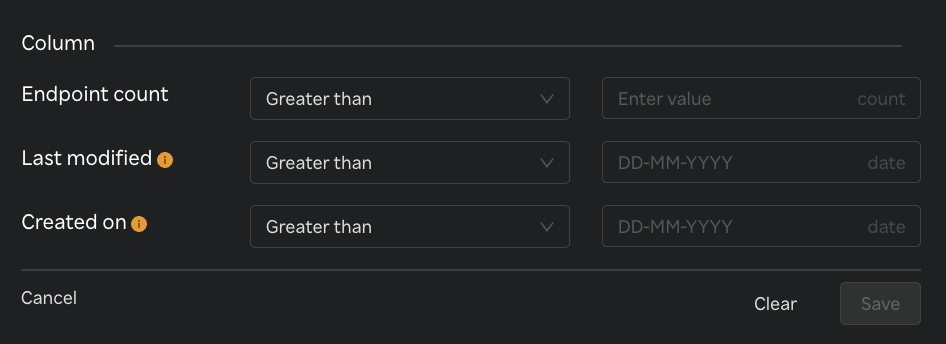
- Once filters & conditions are applied save button is enabled & click "Save" to apply the filter.
- Once filters & conditions are applied it displays no. of filters are applied.
note
- Filters are applied using AND logic — all specified conditions must be met for a record to be displayed.
- Only numeric columns support filtering; non-numeric fields (e.g., text or categorical values) are excluded from the filter options.
- If no records match the selected filters, the table will display a message such as “No data".
- The multi-column filter state persists until the user clears filters by clicking on "Clear" button when Filter by button is clicked.
- A "Reset" button is available to clear all applied filters and restore the table to its original, unfiltered state. This button is enabled only when one or more filters are currently applied.
