Installing the agent
Install the SixthSense agent for Windows by using the following information and procedure.
Analytics Agent/Exporter (latest)
Prerequisites
- SixthSense Analytics Agent. For more information, see Installing the Sixthsense Analytics Agent.
- URL/IP of the Sixthsense backend collector (the tenant URL provided by Customer Support)
- Access token provided by Customer Support.
- PACKAGE_TOKEN - Access Token required for downloading SixthSense Package provided by Customer Support.
- PACKAGE_TOKEN_USERNAME - Username for Access Token provided by Customer Support.
- TOKEN - Access Token from the SixthSense portal Settings page.
- For supported agent versions and framework, see Anlaytics agents.
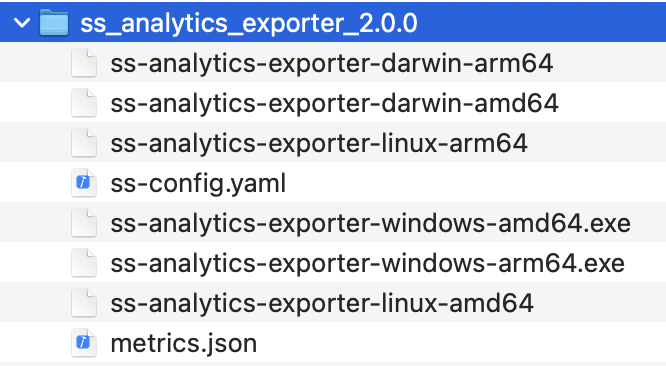
Downloading the Sixthsense Analytics agent version 2.0.0 (latest)
- Download latest ss_analytics_exporter.zip folder using token provided by Customer Support.
- Unzip the release zip folder and place it in the agent directory.
The agent folder structure is as follows:
Installing the Sixthsense Analytics agent
- Update ss-config.yaml as mentioned below.
Running the Analytics agent for windows
Extract ss_analytics_exporter.zip file and edit the configuration in the yaml file with cluster information.
Open the command prompt with run as Administrator and enter the following command:
nssm.exe install “Service_Name”In the NSSM service installer screen, the Application tab is selected by default.
Enter the following details:
- Path:
ss-analytics-exporter-windows-<arch>.exe (exe path) - Startup directory:
<path_to_analytics_exporter>/ss-analytics-exporter-2.0.0 (folder path)
- Click the Details tab.
- Enter the following details:
- Display name: service display name
- Description: service description
- Click the Log on tab.
- Select Local System account radio button.
- Select Allow service to interact with desktop check box.
- Click Install service.
Running the Analytics agent for Linux with nohup
To start the agent, use the following command.
In case of network restrictions, append proxy to the nohup command to enable connection to sixthsense-backend.
- nohup - to start with logs, command output logs will be stored in nohup.out file
- "&" - to start as background process
Running the Analytics agent for Darwin/MacOS
To start the agent, use the following command.
- "&" - to start as background process
Analytics via Infra Agent (Older approach)
Prerequisites
- OS: Windows Server versions 2008R2 and later, and desktop Windows version 7 and later
- SixthSense Windows Analytics Agent. For more information, see Installing the Agent.
- URL/IP of the Sixthsense backend collector (the tenant URL provided by Customer Support)
- Access token provided by Customer Support.
- PACKAGE_TOKEN - Access Token required for downloading SixthSense Package provided by Customer Support.
- PACKAGE_TOKEN_USERNAME - Username for Access Token provided by Customer Support.
- TOKEN - Access Token from the SixthSense portal Settings page.
- For supported agent versions and framework, see Anlaytics agents.
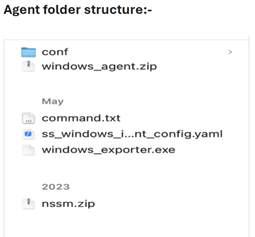
Downloading the infra agent version 2.2.2
- Download latest ss_windows_infra_agent-<version_no>.zip release folder provided by Customer Support.
- Unzip the release zip folder and place it in the agent directory.
The agent folder structure is as follows:
Installing the infra agent
- Update ss_windows_infra_agent_config.yaml as in the instructions mentioned in config file Agent resource usage.
Example of executions_config.yaml file for configuring powershell script path.
- After configuring the the connection details, start the Agent service from services. The metrics will be available on the dashboard.
Running the agent for windows
Extract ss_windows_infra_agent.zip file and edit the configuration in the yaml file with cluster information.
Open the command prompt with run as Administrator and enter the following command:
nssm.exe install “Service_Name”In the NSSM service installer screen, the Application tab is selected by default.
Enter the following details:
- Path: windows.exporter.exe full path
- Startup directory: folder path
- Click the Details tab.
- Enter the following details:
- Display name: service display name
- Description: service description
- Click the Log on tab.
- Select Local System account radio button.
- Select Allow service to interact with desktop check box.
- Click Install service.