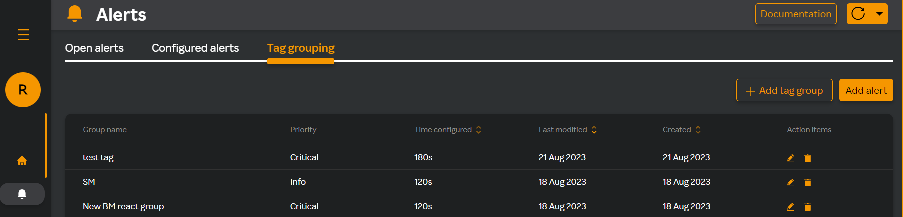
Tagging and grouping alerts
Tagging alerts with either labels or keywords based on the nature, source, severity and so on help in quickly categorizing for better analysis. For example, you can tag them based on a specific application or server and group them. By tagging and grouping alerts you can manage alerts efficiently in turn improving on the response time.
Creating a tag group
- Login to the SixthSense Observability portal.
- Click the Alerts
 icon on the left pane.
 - Click the Tag grouping tab.
- Click + Add tag group.
- In the Add tag group screen, fill in the following details.
| Field | Description |
|---|---|
| Group name | Unique group name. Group name could be the name of the service followed by the metric name. For example, AppPool-Load. |
| Key | Key value for the group. The value could be the capability name followed by a string. For example, BM-key1. |
| Grouping condition | All will meet all the grouping conditions and Custom will meet only the condition you specify in the Custom expression field. For example, ((A AND B) OR C) |
| Value | Select values that you have already defined from the drop-down list. You can use the logical AND OR operators for the values you select. Group can have two conditions in one sub-group. For example, (A) ( OR , AND) which return either TRUE or FALSE if the conditions are met. |
note
Click + Add to add more groups. You can add upto 5 groups.
Click Next.
Select the time from the Group aggregation time drop-down list.
Enter the text you want to send as part of the notification for the user in the Manual notification text box.
Click Next.
Select channels for notification from the Channel drop-down list.
Note: You can multi-select the channels.
Set the priority for the alert from the Set priority radio button options.
Click Save.
The following screen appears with the details you have configured.
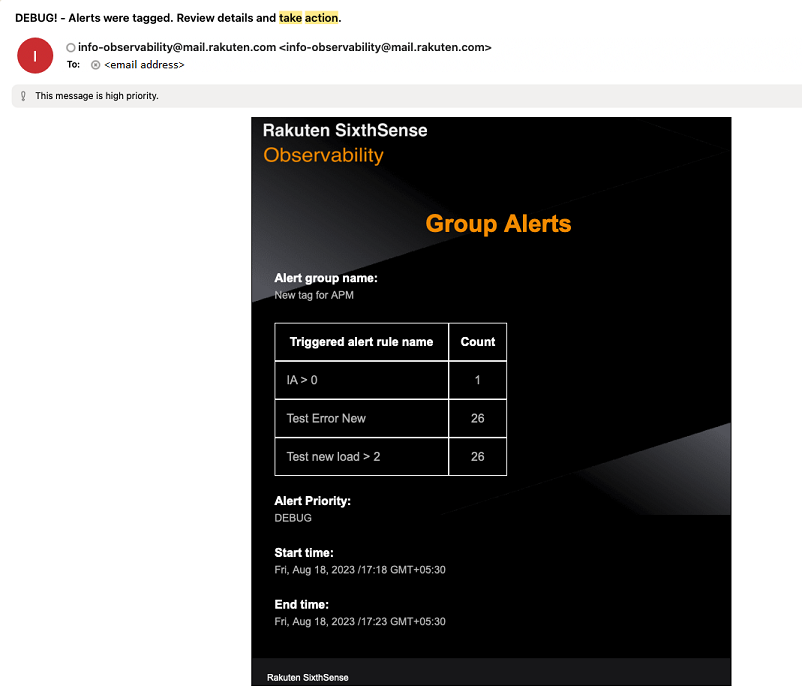
Example: Email notification for group alerts
Following is an example of the email alert notification that you will receive if you have tagged alerts.
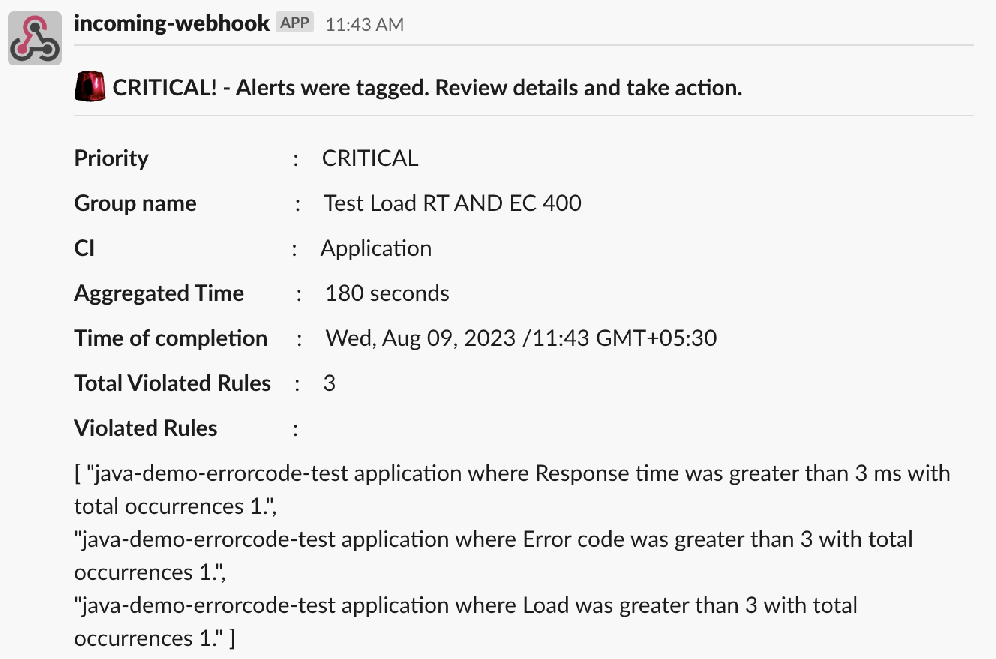
Example: Webhook notification for group alerts
Following is an example of the webhook alert notification that you will receive if you have tagged alerts.
Editing a tag group
- Login to the SixthSense Observability portal.
- Click the Alerts icon on the left pane.
- Click the Tag grouping tab.
- Click the edit
 icon against the group name you want to edit under the Action items column.
 - In the Edit tag group screen, modify the fields.
- Click Update.
Deleting a tag group
- Login to the SixthSense Observability portal.
- Click the Alerts icon on the left pane.
- Click the Tag grouping tab.
- Click the edit
 icon against the group name you want to edit under the Action items column.
 - Click Delete in the Delete tag group window.
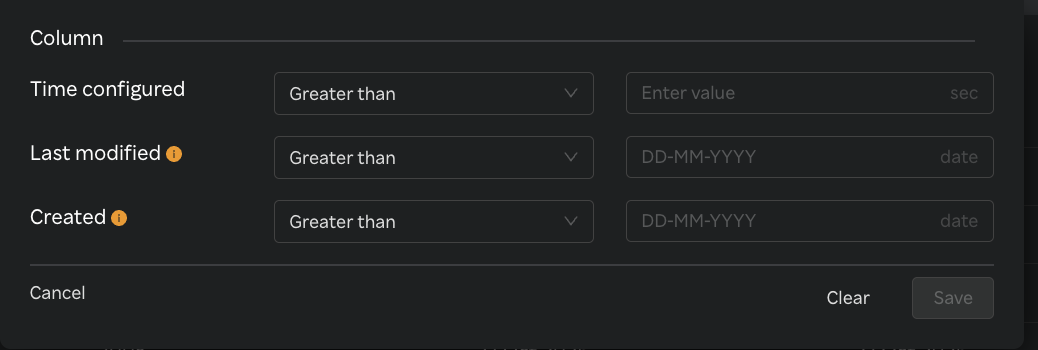
Multi-column Filter
- Multi-column filter can be applied on numeric columns within the Tag grouping Table to refine the displayed data based on specific conditions.
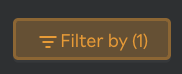
- When the user clicks on the “Filter by” option, user can apply filter below numeric columns
| Column Name | Description |
|---|---|
| Time configured | Threshold configured for alert tag grouping. |
| Last modified | Timestamp indicating when the alert grouping was last updated. |
| Created | Date and time when the alert grouping was initially created. |
- Each filter condition is applied using the below operators and value ( user input based on the unit)
| Operator |
|---|
| Greater than |
| Less than |
| Equals |
| Greater than or equals |
| Less than or equals |
- Once filters & conditions are applied save button is enabled & click "Save" to apply the filter.
- Once filters & conditions are applied it displays no. of filters are applied.
note
- Filters are applied using AND logic — all specified conditions must be met for a record to be displayed.
- Only numeric columns support filtering; non-numeric fields (e.g., text or categorical values) are excluded from the filter options.
- If no records match the selected filters, the table will display a message such as “No data".
- The multi-column filter state persists until the user clears filters by clicking on "Clear" button when Filter by button is clicked.
- A "Reset" button is available to clear all applied filters and restore the table to its original, unfiltered state. This button is enabled only when one or more filters are currently applied.
