Getting started
Use the SixthSense Observability portal to track the performance of your applications. To do so, you must login to the portal. Follow the procedure below to login. If you have forgotten your password you can recover your password. You can also access your access token, reset your password, set your timezone and apdex score from the Settings page. For more information, follow the procedures below.
Log in to the SixthSense Observability Portal
Go to your browser and type the instance URL https://observability.sixthsense.rakuten.com and for OneCloud users, use the https://sixthsense-observability.jpe2-caas1-prod1.caas.jpe2b.r-local.net/ URL.
The Log in screen appears.
Enter your username and password in the Username and Password fields.
Select Remember Me checkbox if you want the system to remember your credentials when you login next.
Click Login.
Recovering your password
Go to your browser and type the instance URL https://observability.sixthsense.rakuten.com. For OneCloud users, use the https://sixthsense-observability.jpe2-caas1-prod1.caas.jpe2b.r-local.net/ URL.
The Log in screen appears.
Click Forgot Password?. The Recover password screen appears.
Enter your registered email.
Click Send me a password recovery link. An email is sent to your registered email address with a link to recover the password.
Accessing your Access Token
- Click the
 icon on the left pane.
The following screen appears.
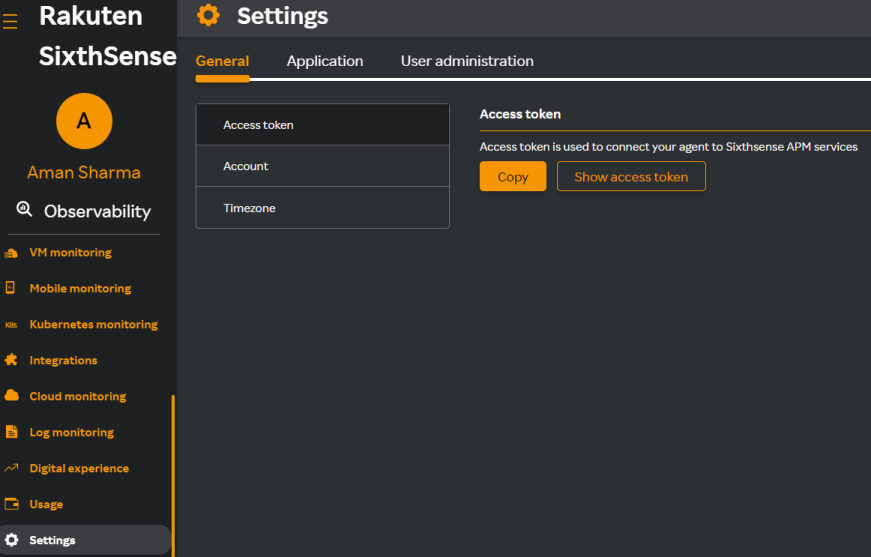
- Click Access Token in the General tab.
- Click Show access token. The access token appears.
- Click Copy to copy the access token. The access token is copied.
Resetting your Password
- Click the icon on the left pane.
- Click Account in the General tab. Your account user ID appears.
- Enter your existing password in the Enter old password field.
- Enter the new password in the Enter new password field.
- Confirm the new password by entering it in the Re-enter new password field.
- Click Save. Your password is changed.
Setting up your Timezone
- Click the icon on the left pane.
- Click Timezone in the General tab.
The following screen appears.
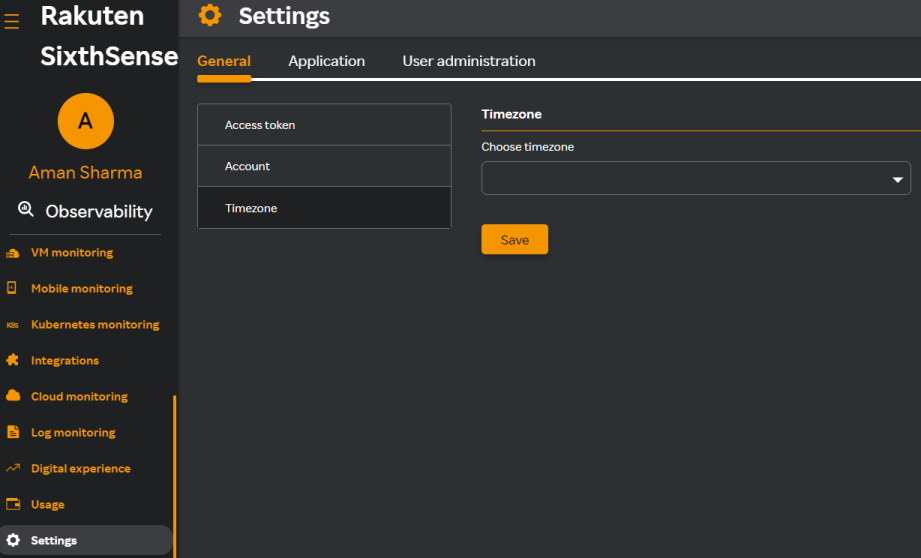
- Select your timezone from the Choose timezone drop-down list.
- Click Save. The timezone you have selected is updated successfully.
Configuring the Apdex Score
The SixthSense application internally calculates the apdex score based on the performance of an application and displays the health indicator accordingly. To configure an application's response time threshold in milliseconds, follow the procedure below.
- Click the icon on the left pane.
- Click Application tab.
- Select the capability from the Select capability drop-down list.
- Select an application from the Select application drop-down list.
- Select Apdex configuration.
- Increase or decrease the response time threshold in the Response time threshold list.
- Click Save. The response time threshold is updated successfully.
Creating Role Based Users and Accessibility
Role: SOE, SRE, L1 and L2 support
The platform administrator can create and assign roles to a user to restrict the access for the user on the SixthSense Platform. The Billing admin user is the super user and is created by Rakuten Customer Support.
The Billing admin user can create the following two kinds of users:
- The Platform Admin user
- The Read-only Platform user
Actions that different types of users can perform
The following table lists the various actions users can perform.
Billing admin user
- Cannot perform edit and delete actions on self.
- Can create a Platform admin user or Read-only user.
- Can copy reset link, edit, and delete of other users.
Platform admin user
- Can copy reset link of self.
- Can copy reset link, edit, and delete a Read-only platform user.
- Can create a Read-only platform user.
Read-only platform user
- Will not have access to User administration tab.
Creating Platform Admin or Read-only Platform user
- Navigate to Settings on the left pane from the SixthSense Observability portal page.
- Click the User administration tab.
- Click + Add user.
The add user screen appears.
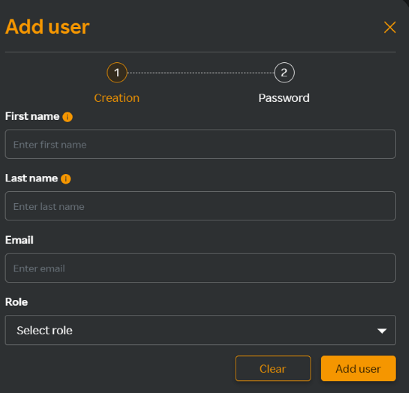
- In the Add user screen, enter the following details.
| Field | Description |
|---|---|
| First name | User’s first name. |
| Last name | User’s last name. |
| User’s email address. | |
| Role | User’s role you want to assign. |
- Click Add user. The password is created for the first time.
- Click Copy to copy the randomly generated password which you can share with the user.
note
The Billing admin user can perform the following tasks:
- Add only up to 10 users which includes the Billing admin user role.
- Copy reset link, edit, and delete Platform admin users.
- Cannot perform any of the actions for the Billing admin user role.
Resetting password
The Platform admin user can copy the reset link, share, edit, and delete a Read-only platform user by clicking the respective icons available next to the user using the following procedure.
- Click the
 icon against the user.
 - Share the link with the user.
- The user will copy/paste the link in the browser.
The following screen appears.
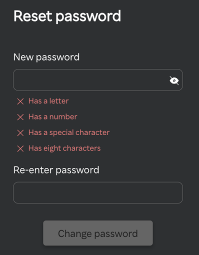
- Enter the new password in the New Password field.
- Re-enter the password in the Re-enter password field.
- Click Change password.
note
The user can use the application after 1 hour.
Data retention policy
You can configure data retention for each service. By default only traces, spans, and db query statements that satisfies the default values will be saved and shown in APM dashboard. If you have configured anything for a service, then everything gets saved as per the configured values.
Note: The number of days we store data collected is by default 7 days for traces and 90 days for metrics.
By default all error traces and error spans are saved. The default values are:
- default traces over 300 ms latency
- default db query statements over 80 ms latency
- default maximum number of spans in a trace that are saved is 200
- Click the icon on the left pane.
The following screen appears.
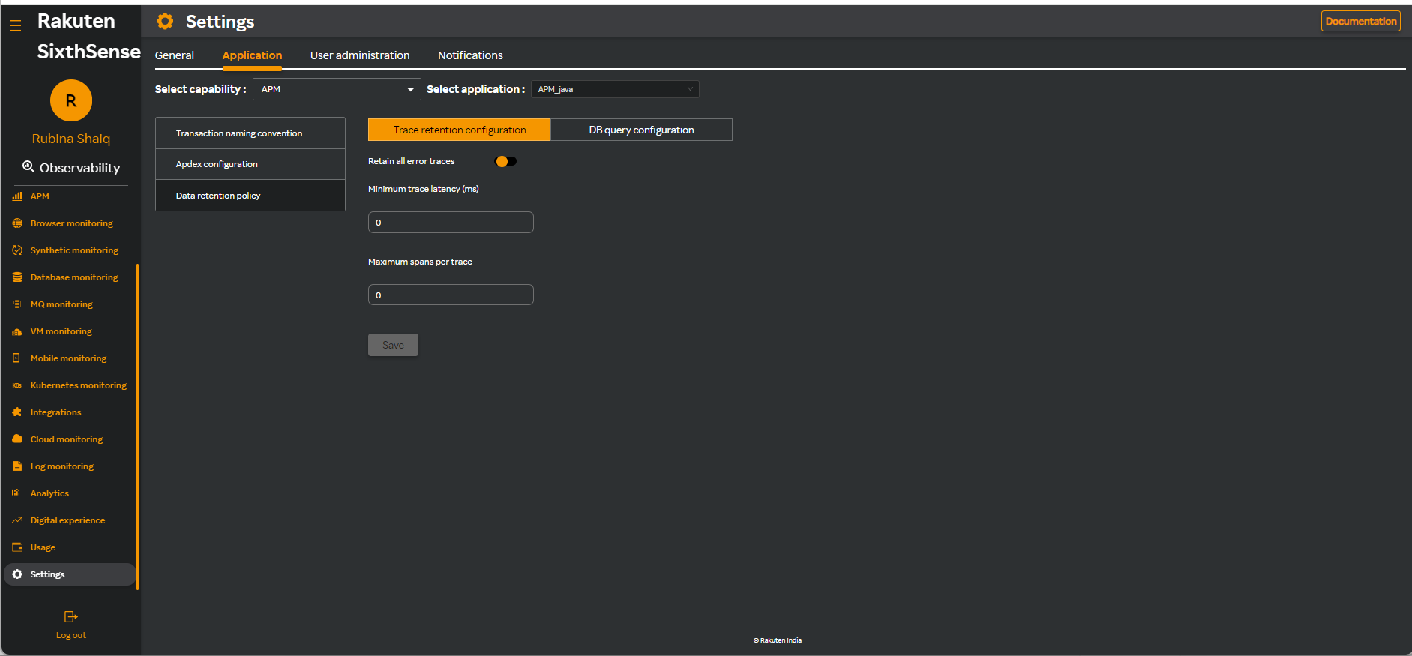
- Click Application tab.
- Select APM from the Select capability drop-down list.
- Select an application from the Select application drop-down list.
- Select Data retention policy.
- Select Trace Retention Configuration or go to DB Query Configuration.
- Enable Retain all error traces to retain all error traces. When retain all error traces is enabled, all the error traces irrespective of the values you set in the following fields are displayed in the APM dashboard.
- Enter the minimum trace latency value in milliseconds.
- Enter the maximum spans per trace.
- Click Save.
- Go to APM > Trace to see the traces according to the threshold values you have set.
DB Query Configuration
- Click DB Query Configuration.
- Enter minimum db query latency in milliseconds.
- Click Save.
- Go to APM > Dashboard > Database > Query to see all the database queries according to the threshold value you have set.
Transaction naming convention
While naming endpoints , we are auto-discovering the transactions by using the last 2 Segments of the URI. The issue is that if the last 2 segments have a dynamic values then the endpoint list will grow exponentially. This will result in UI slowness and alerts can’t be configured for all the endpoints.
You now have 2 options to resolve this by using Application for configuring a single rule for an entire application and Endpoints to configure 20 rules for an application. Use the following procedure for configuring rules.
Application
- Click the icon on the left pane.
- Select the Application tab.
The following screen appears.
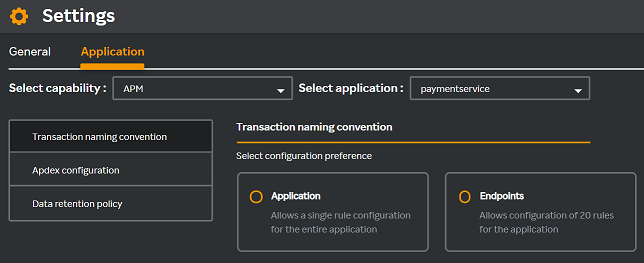
- Select the Application radio button.
The following Set application rule window appears.
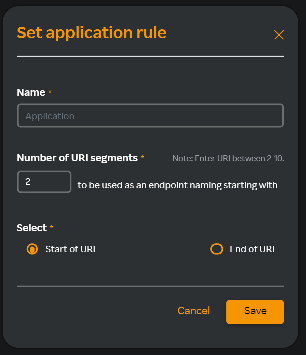
- Enter the application name in the Name field.
- Select the number of URI segments in the Number of URI segments drop-down list.
- Select Start of URI if you want the segment at the beginning of the URI or select End of URI if you want the segment to appear at the end.
- Click Save.
Navigate to APM > Endpoint where you can see the URI with the number of segments you have defined under the Name column.
Endpoints
- Click the icon on the left pane.
- Select the Application tab.
- Select the Endpoints radio button.
The following Set endpoint rule window appears.
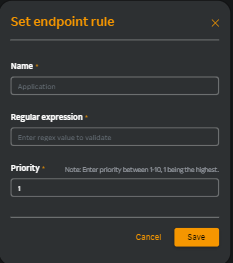
- Enter the application name in the Name field.
- Enter the regex value in the Regular expression field.
- Select the priority from the Priority drop-down list.
- Click Save.
Prerequisite checks for agent installation
Before installing the Sixthsense agent, you must perform certain checks from the client system. To ensure smooth installation, perform the following procedure.
- Check if Curl is installed: Run the command
curl --help. If Curl is not installed, download and install it from https://help.ubidots.com/en/articles/2165289-learn-how-to-install-run-curl-on-windows-macosx-linux. - Check connectivity to SixthSense URLs: Use Curl to connect to the list of SixthSense URLs and verify that you receive a valid response indicating that the connection is established. Run the following Curl commands and provide the onboarding team with a screenshot of the response.
note
Please contact the onboarding team for the SixthSense collector URLs.
On successful connection you will get response from the curl commands. Sharing a sample positive response below.
- If you are not getting the above positive response, the client must whitelist sixthsense.rakuten.com. Ensure that sixthsense.rakuten.com is whitelisted on the client system to avoid any connectivity issues during installation.
Prerequisites to check connectivity
To install and integrate SixthSense agents, download the following files and check the connectivity.
For Windows based servers:
Clicking the following URL will download the connection-check.bat file. Run the file and verify the connectivity.
For Linux based servers:
Clicking the following URL will download the connection-check.sh file. Run the file and verify the connectivity.
To install agents, you must have connectivity to the following 3 addresses from the host machines. If you are not able to access, please whitelist these 3 addresses from your side.
- https://artifacts-observability.sixthsense.rakuten.com/
- https://http-collector-observability.sixthsense.rakuten.com/
- grpc-collector-observability.sixthsense.rakuten.com:443 on 443 ports.